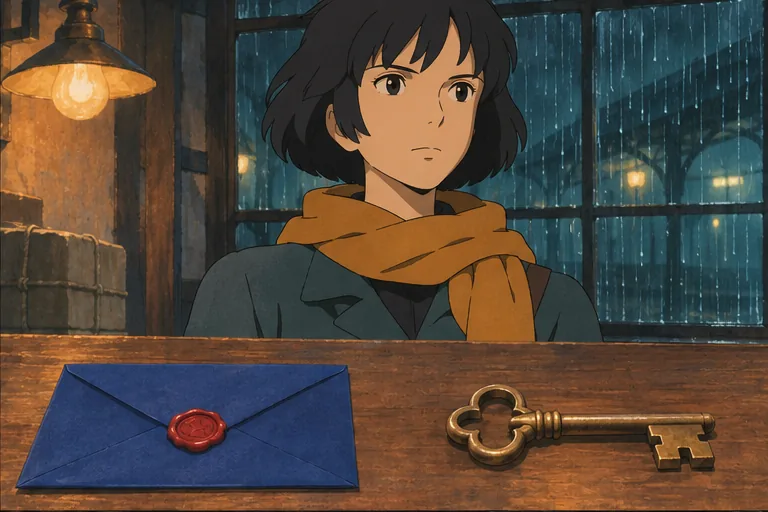
Save the frame you actually plan to cut from
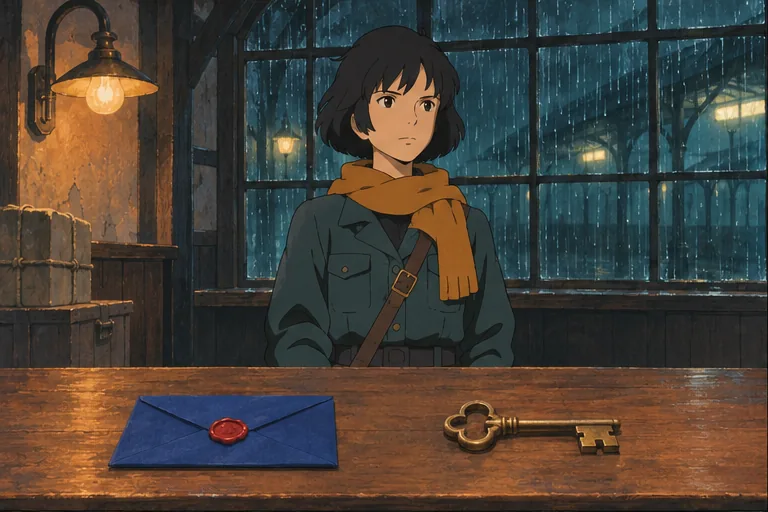
Stop on the last usable frame before the cut. In the courier scene, both objects still rest on the counter. A rehearsal still taken after the actor picked up the key would give the next setup a different starting point. Write the shot and take beside the image so someone can retrieve the same frame later.
Name one fixed feature in the frame, such as the near edge of the counter. When a tighter shot removes the courier’s face from view, that edge and the two objects can still identify the setup.
Try thisRecord the start and end as separate states
Write where each prop begins, who touches it and where it ends. For the example, the entire reference action is a pause: the sealed envelope stays on the left and the key stays on the right. One line covers it. If the courier pockets the key in a later shot, the ending changes to “key off the counter, in the courier’s pocket.”
Use “screen left” for the audience’s view and “courier’s left hand” for the actor’s body. A note that only says “left” leaves the next person to guess which you meant.
Compare each pickup at the point of the cut
Look away from the courier’s expression for a moment and check the objects in the order you wrote them down. First find the envelope, then the key. In Take A they trade sides. A viewer could read that as the work of an unseen hand. Take B preserves the arrangement and lets attention stay with the courier.
A closer lens or a tighter crop can change the distance between objects in the picture. Judge their relationship to the counter, each other and any visible hand before deciding that something moved.
Give the next take one reproducible reset
Write the smallest instruction that would let someone reproduce the reference. For this pickup, “return the sealed envelope to screen left and the key to screen right, then compare with shot 01” is enough. “Fix the props” leaves two positions unresolved. Keep the rejected take number alongside the reset so it cannot slip into the edit by accident.
If a move is deliberate, log the action that motivates it. Showing the courier slide the envelope across the counter creates a new ending state for the following shot. The old arrangement now belongs to the earlier cut.
Carry the log to the edit
Open the blank continuity log and make a copy for one of your own cuts. Put the outgoing frame next to the first frame you will actually use from the incoming take. Write the match decision while both are visible. A row can also say “unclear: prop hidden by the sleeve” so an editor knows exactly what to check.
If you have yet to choose the angle or the length of the shot, sketch it first with the four-panel anime action storyboard. Attach the continuity row once you have a frame to match.
Common mistakes
Using the start of a take when the action changes before the cut. Save the last usable outgoing frame.
Recording a new screen position without naming the camera angle. Walk to the other side of a counter and the same physical arrangement can look reversed.
Writing “same as before” after a prop leaves the frame. Identify the reference and mark what is hidden.
Questions
What belongs in a shot continuity log?
For each setup, record the take, the reference frame, the prop state at the start and end, what moved it, and the match or reset decision. Add a timecode or filename that lets the editor find it.
How is this different from a shot list?
A shot list plans which views to capture. A continuity log records what happened in particular takes, so the next setup or edit can match an observed state.
What if the camera crosses to the other side?
Make a small overhead sketch or record the camera side and a fixed landmark. The envelope may appear on the opposite side of the frame even though it stayed put on the counter.
Can I use it for an illustrated or AI-generated scene?
Yes. Record the selected image filename in the take field and compare the next illustration with it. If you replace an image, update the reference so everyone works from the same version.