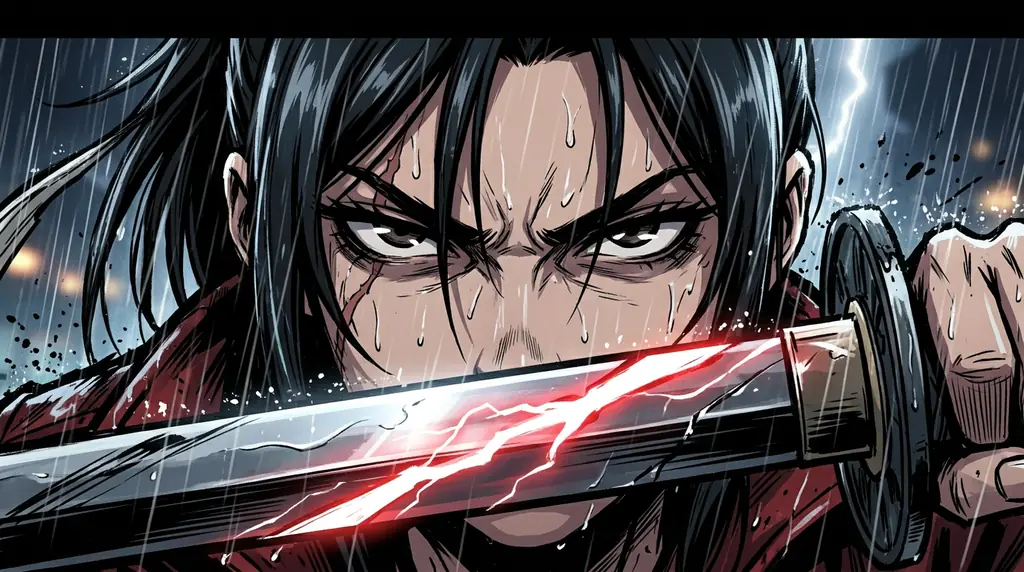
Pick the reaction your last panel has to earn
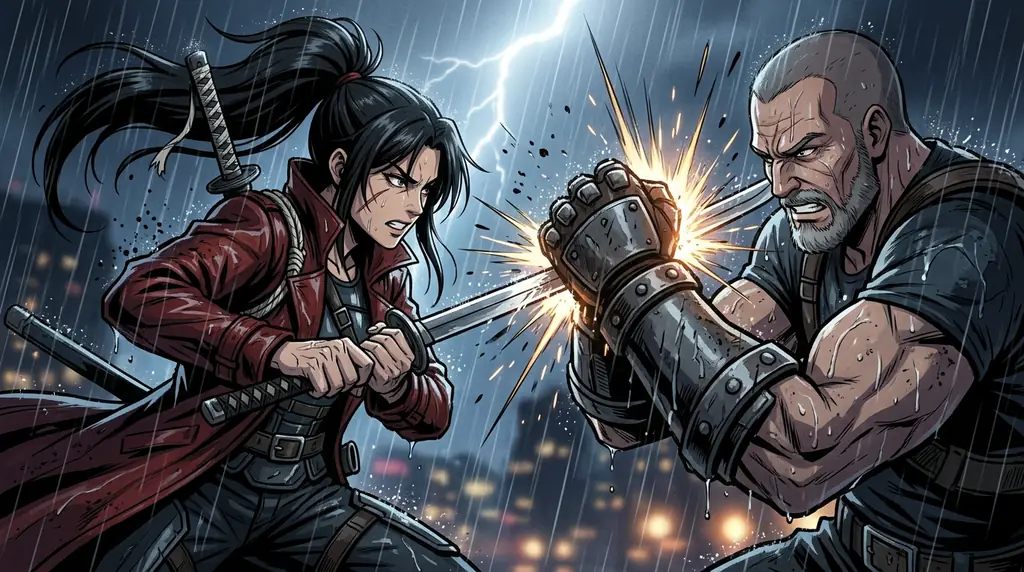
Place the close-up at the end of the row before deciding what comes first. Mara’s eyes and the red reflection can suggest resolve, fear or recognition. Choose one reading for your board. To suggest recognition, hold her gaze before the wide view so there is someone for her to recognize. To suggest surprise, begin wider and save the close-up until after the white flash.
Write the chosen reading beside panel D. An artist can now judge whether the earlier panels give the audience enough information to arrive at it.
Give the viewer a map in the wide shot
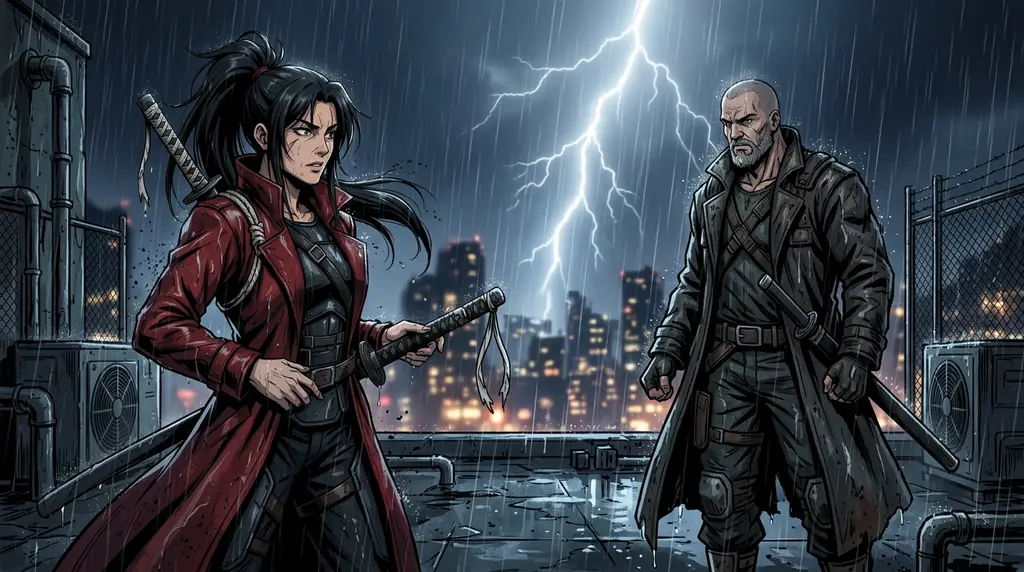
Draw two rough silhouettes for panel B. Put Mara on the left and her former partner on the right. Add the roof edge behind both, then mark the gap between them. Cover the names. If a reader can still tell which silhouette belongs to the red coat and which part of the roof separates the pair, your map is doing its job.
Keep that left-right arrangement in panel C. If you decide to swap sides later, add a wider frame that lets the audience see the change happen.
Follow the eye across each cut
Put your finger on the detail you want someone to notice at the end of panel B. Follow it into panel C. The open space between the figures now contains a white flash. That makes the new information easy to find even though the framing is tighter. In panel D the red reflection sits underneath Mara’s eyes, giving the viewer a route back to her expression.
For your own board, circle one detail per panel. If two circles land far apart across a fast cut, give the second image a little longer to read.
Time two versions with the same pictures
Lay the pictures on a desk or put each on a slide. Use the times in the table and tap through them with a stopwatch. The second panel allows a full two seconds to map the rooftop. The third gives the white flash one second. Watch once at the size of a phone screen. Did you see both faces before the scene moved on?
Try moving one second from the rooftop wide to the final close-up. If the reaction gains weight but the geography becomes confusing, put half a second back. Write down the version you prefer.
Hand over the board with a continuity note
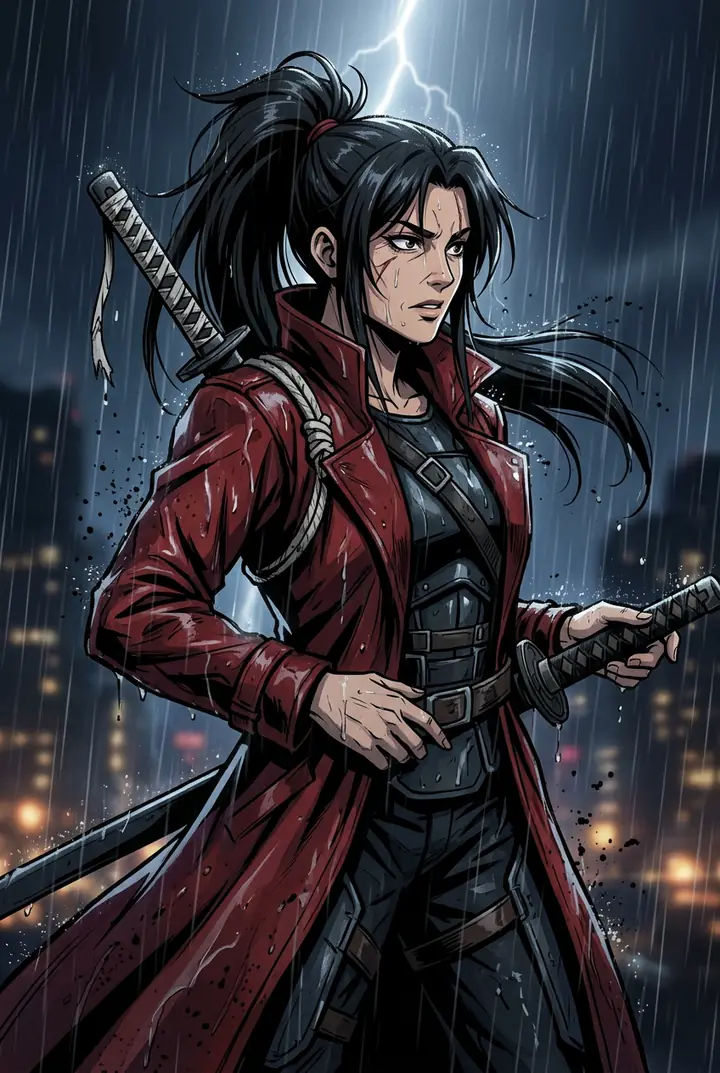
Give the next person the pictures in order, the planned holds, the identity of the viewpoint character and one sentence naming what must stay consistent. For this board, that sentence is “Mara remains on screen left until the close-up; keep the rain and the red coat visible across the wider shots.” Someone else can now rough out an edit without guessing who the final eyes belong to.
Use the blank four-panel sheet for your own version. When the same object appears in two panels, the shot continuity log gives you a place to record which side it stays on. The anime action maker shows the original cast and the illustrated rooftop setting.
Common mistakes
Counting an effect as another shot. The white flash is part of panel C unless you deliberately cut away to a separate frame.
Flipping two characters between adjacent shots without showing how they changed places. Check the screen positions on a thumbnail of the board.
Giving every frame the same hold by default. Read the wide, the flash and the reaction separately before choosing their lengths.
Questions
Can I use this storyboard without drawing?
Yes. Use rectangles, initials and an arrow for the viewer’s attention. Keep the notes on shot size, position and the reason for the cut.
Is there a filmed version of this rooftop board?
This worksheet uses four published illustrations. Its six-second timeline is a proposed edit that you can try with the stills.
How do I turn the board into a rough animatic?
Set the stills on a timeline or time them as slides. Adjust their holds, then review the sequence without pausing. You can test the cuts before making final animation.
How do I adapt the board for a quieter scene?
Replace the central flash with a visible change, such as a light going off between the characters. Keep the establishing view and give the final reaction enough time to register.